Countertops · guide
Porcelain slabs vs. quartz: which countertop for a Florida kitchen?
Heat, stains, seams, outdoor kitchens and price per square foot — the honest comparison.
ReadWalls · guide
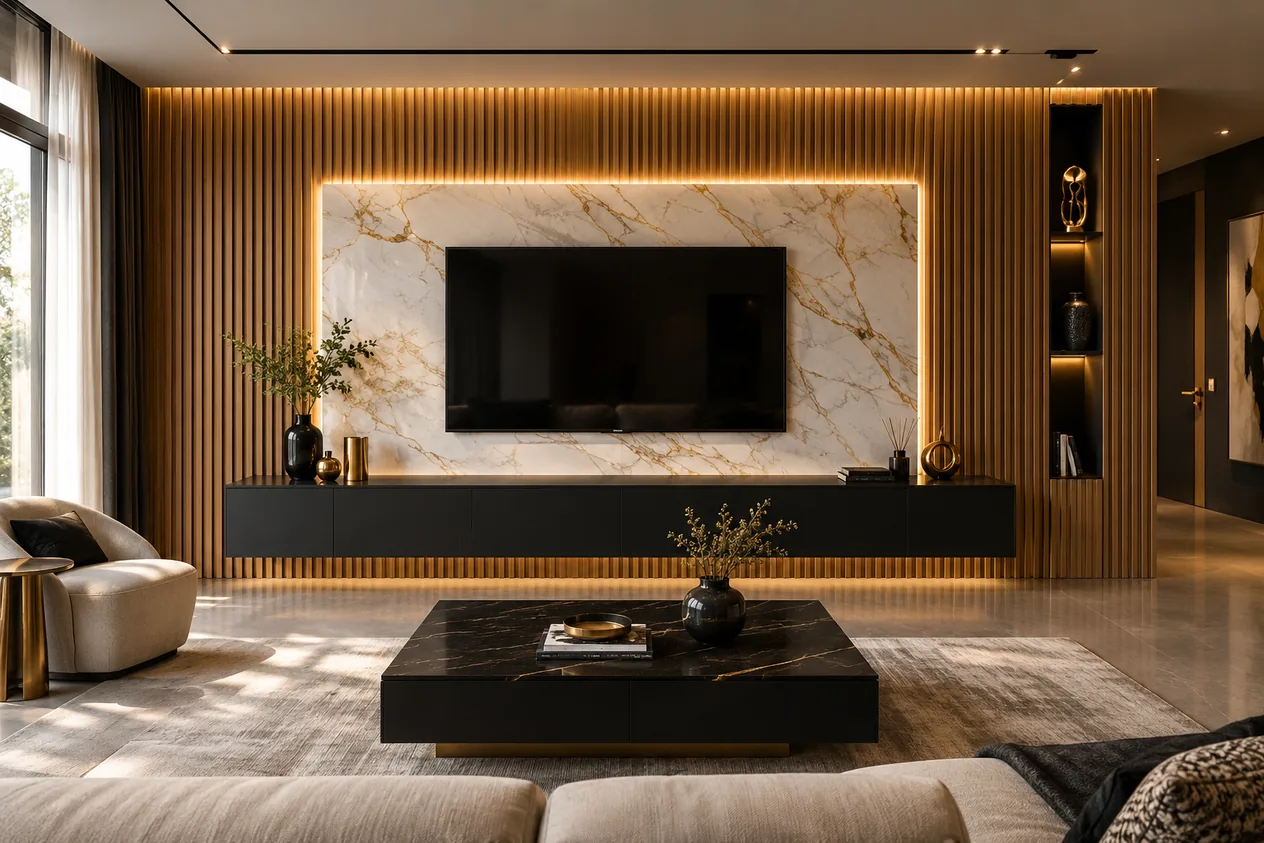
The fluted panels on our sample wall are WPC — wood-plastic composite — a hollow-core board that mixes wood fiber with plastic polymer instead of using solid wood. That construction is what makes them waterproof and stable: they do not swell, rot or warp the way a solid-wood slat wall can in a humid Florida house, and the hollow core keeps them lighter than they look. The fluted grooves are milled into the face, and the finish — a wood-tone laminate or a solid painted color — is applied over the whole board, so the color runs consistently from edge to edge.
Panels come as long boards, typically around 9 to 10 feet, roughly 6 inches wide — treat those as typical dimensions rather than an exact spec, since a run can vary slightly by finish and batch. Boards click or slot together edge to edge (a tongue-and-groove profile) to build up a wall of any width, which is why the useful unit to think in is “how many boards,” not “how many square feet.”
The most common use on our floor is a TV wall — the vertical grooves add texture and hide a flat television without competing with it, and a floating console underneath finishes the look. A headboard wall is the second most common request, followed by a ceiling accent, a covered lanai ceiling, and retail storefronts or hallways where a plain drywall run needs texture without a full renovation. Anywhere you want depth on a wall that would otherwise be flat, fluted panel is worth a look.
WPC is waterproof, but that is not the same as being built for direct weather. Skip it on a wall in full, uncovered sun and rain — an open patio wall with no roof over it will take UV and moisture exposure the panel was not designed for. Inside a wet shower stall is also the wrong spot unless the specific panel you are looking at is explicitly rated for constant water contact — ask us directly before you use it there, since not every finish in the showroom is rated the same way.
A fluted panel wall lives or dies on the first line: snap a level line before the first board goes up, because the vertical grooves make even a small lean obvious in a way flat drywall never shows. From there, boards typically go up with construction adhesive plus nails or screws driven through the groove itself, where the fastener disappears into the shadow line instead of showing on the face. Panels can go over furring strips or directly onto solid drywall, and trim pieces finish the corners and edges so no raw board end is left showing. For a lit accent, an LED strip is usually run behind the panel or tucked into a recessed channel before the panels go up — plan that wiring before the wall is closed, not after.
The hollow-core, grooved profile does a genuinely good job breaking up sound reflections compared to a flat painted wall, which is part of why it shows up so often behind a TV or a bed — it takes a little echo out of the room along with the visual upgrade. The same panel is also a convenient way to hide wiring: a TV wall run behind fluted panel can route the power cord and HDMI cable inside the panel or furring so nothing hangs visible.
We price fluted panel by the board, not by the square foot, so the fastest way to estimate a job is: measure the width of the wall you are covering, divide by the width of one board, and round up — that is roughly how many boards the wall needs, before trim. Send us that wall width on WhatsApp along with the color you are considering and we will confirm the board count and the trim pieces needed for a clean finish.
Oak and light wood tones pair naturally with the light-oak cabinets and vanities on our floor and read warm against a white or grey porcelain slab. Walnut and darker tones work well as a contrast wall against white cabinetry or a black fixture package. Grey and white fluted panels sit quietly behind a bold slab with heavy gold veining, letting the countertop or backsplash be the star of the room instead of competing with it.
Bring a photo of the wall you want to cover and the room’s other finishes — cabinet color, slab, flooring — and we will point you to the two or three panel tones on our wall that actually work together.
Heat, stains, seams, outdoor kitchens and price per square foot — the honest comparison.
Read
What to measure before you come in, and which finishes hold up to humidity.
Read